Hello and welcome to today's post.
The ESP modules are very popular. We have shown in the past how easy it is to connect to the WLAN, display web pages, and switch relays.
However, a very useful feature is the ability to store data in the flash memory of the ESP. So it is possible to upload files that we can access later with our sketch. Or to store information that is still available after a reboot.
Upload files to the ESP
We need the tool "ESP8266FS" - an extension that integrates into the Arduino IDE. It adds the entry "ESP8266 Sketch Data Upload" in the "Tools" menu.
First we download the tool from the ESP8266 GitHub page:
https://github.com/esp8266/arduino-esp8266fs-plugin/releases/download/0.1.3/ESP8266FS-0.1.3.zip
We now create a folder named "tools" in the same folder as our Arduino sketches. Normally this is located at "C:\Users\<username>\Documents\Arduino\".
Unzip the downloaded .zip file and copy the ESP8266FS folder into the "tools" directory. We will end up with "C:\Users\<username>\Documents\Arduino\tools\ESP8266FS\tool\esp8266fs.jar".
Now we restart the Arduino IDE, and make a new sketch. I call mine in this example "ESP-Data-Test". Now we have to save this sketch.
We now navigate to the newly created folder "C:\Users\<username>\Documents\Arduino\ESP-Data-Test" and create the folder "data" there. All files placed here will be uploaded to the flash memory of the ESP as soon as we do the upload.
I create a new text file named test.txt, write a few lines of text in it, and save it to the new "data" folder.
I use one ESP8266-01S with USB adapter, so I set the following options under tools:
- Board: "Generic ESP8266 modules"
- Flash Size: "1m (64k Spiffs)
- Upload speed: "115200"
- Port: "Comx" - Select your COM port
If you don't know the memory size of your module, there is a tip at the end of the article how to determine it.
As a test let's try to load the empty sketch (only void setup() and void loop()) to the ESP. For my ESP I have to make sure that the programming mode is activated.

If all this worked, we can try to upload the content of the "data" folder to the ESP. For this we go to "Tools" -> "ESP8266 Sketch Data Upload".
In the IDE appears "SPIFFS Uploading Image..." ... and after a short time appears: "SPIFFS Image Uploaded":

If you get an error at this point ("SPIFFS Upload failed!"), it is probably because the ESP is no longer in programming mode. Just disconnect and reconnect the USB connection, making sure that the programming mode is activated.
Use Spiffs in a sketch
To use SPIFFS in Sketch, we include the FS.h library:
#include "FS.h"
Now we have the following commands available:
File system object (Spiffs)
SPIFFS.begin()
Mounted the Spiffs file system. Must always be carried out before all other commands. Gives back "True" if the mounting worked, otherwise "false".
SPIFFS.format()
Formatted (deletes) the file system. Gives back "True" when the formatting was successful.
SPIFFS.open(path, mode)
Opens a file. As "path" they specify the file name including the absolute path (e.g. "/folder name/test.txt"). "mode" specifies the type of access. Can contain the following options: "r", "w", "a", "r+", "w+", "a+".
- "r" Opens the file for reading. The file must exist
- "w" Creates a new file without content. If a file with the same name exists, its content is deleted and the file is seen as a new empty file.
- "a" Appends data to the file. The data is appended to the end of the file. If the file does not exist, a new one is created.
- "r+" Opens a file for reading and writing. The file must exist.
- "w+" Creates an empty file for reading and writing.
- "a+" Opens a file for reading and appending.
if (!f) {
Serial.println("file open failed");
}
SPIFFS.exists(path)
Gives back "True" if the path exists, otherwise "false".
SPIFFS.openDir(path)
Opens the specified directory. Gives back a "object".
SPIFFS.remove(path)
Deletes the specified path. Gives back a "true" if the deletion was successful.
SPIFFS.rename(pathFrom, pathTo)
Names a file to "Pathfrom" to "Pathto". The path must be absolutely. Gives back a "True" if the renaming was successful.
File system info structure
FSInfo fs_info;
SPIFFS.info(fs_info);
Fills the FSINFO structure with information about the file system. Gives a "True" back in the event of success, otherwise a "false".
Structure:
struct FSInfo {
size_t totalBytes;
size_t usedBytes;
size_t blockSize;
size_t pageSize;
size_t maxOpenFiles;
size_t maxPathLength;
};
Directory Object (Dir)
The "you" object enables us to address files within a directory using the "Next ()", "Filename ()" and "OpenFile (fashion)" methods.
Dir dir = SPIFFS.openDir("/data");
while (dir.next()) {
Serial.print(dir.fileName());
File f = dir.openFile("r");
Serial.println(f.size());
}
dir.next() is true as long as it finds files in the directory. It must be called before "fileName" or "openFile".
"openFile" takes the "mode" argument, which is identical to SPIFFS.open.
File Object (file)
SPIFFS.open and dir.openFile return a "file" object. This is a stream object and supports all functions like "readbytes", "findUntil", "parseInt", "println" and all other stream methods.
But there are also some that are specific to the file object.
file.seek(offset, mode)
Like the Fseek function in C. The current position shifts as follows depending on the value of "fashion":
- SeekSet -> Position is set on "Offset" bytes from the beginning
- SeekCur -> Current position is moved by "Offset" bytes
- SeekEnd -> Position on "Offset" bytes from the end of the file
file. position ()
Gives the current position within the file as a value in bytes
file.size ()
The file size in bytes is reflected.
file.name ();
Gives the file name again as "Const Char*". Can use "String Name = File.Name ();" be saved in a string.
file.close ()
Closes the file.
Practical example
Now we are writing a small sketch to test the whole thing: We want our text file "Test.txt" which we create at the beginning and filled with a few lines of text on the serial monitor.
#include "Fs.H" // Here we bind the required library

void set up() {
  Serial.Begin(9600); // activate serial output
  delay(1000); // short break so that we have time to open the serial monitor.

  Spiff.Begin(); // Mounten file system
  File F = Spiff.open( "/test.txt", "R"); // open file to read
  IF (!F) {
    Serial.print("File Open Failed");
  }
  String data = F.reapring(); // Content of the text file is read ...
  Serial.print("Content of the open file:");
  Serial.print(data); // ... and spent again
  F.close(); // We close the file
}
void loop() {
}
After uploading, the output appears on the serial monitor:

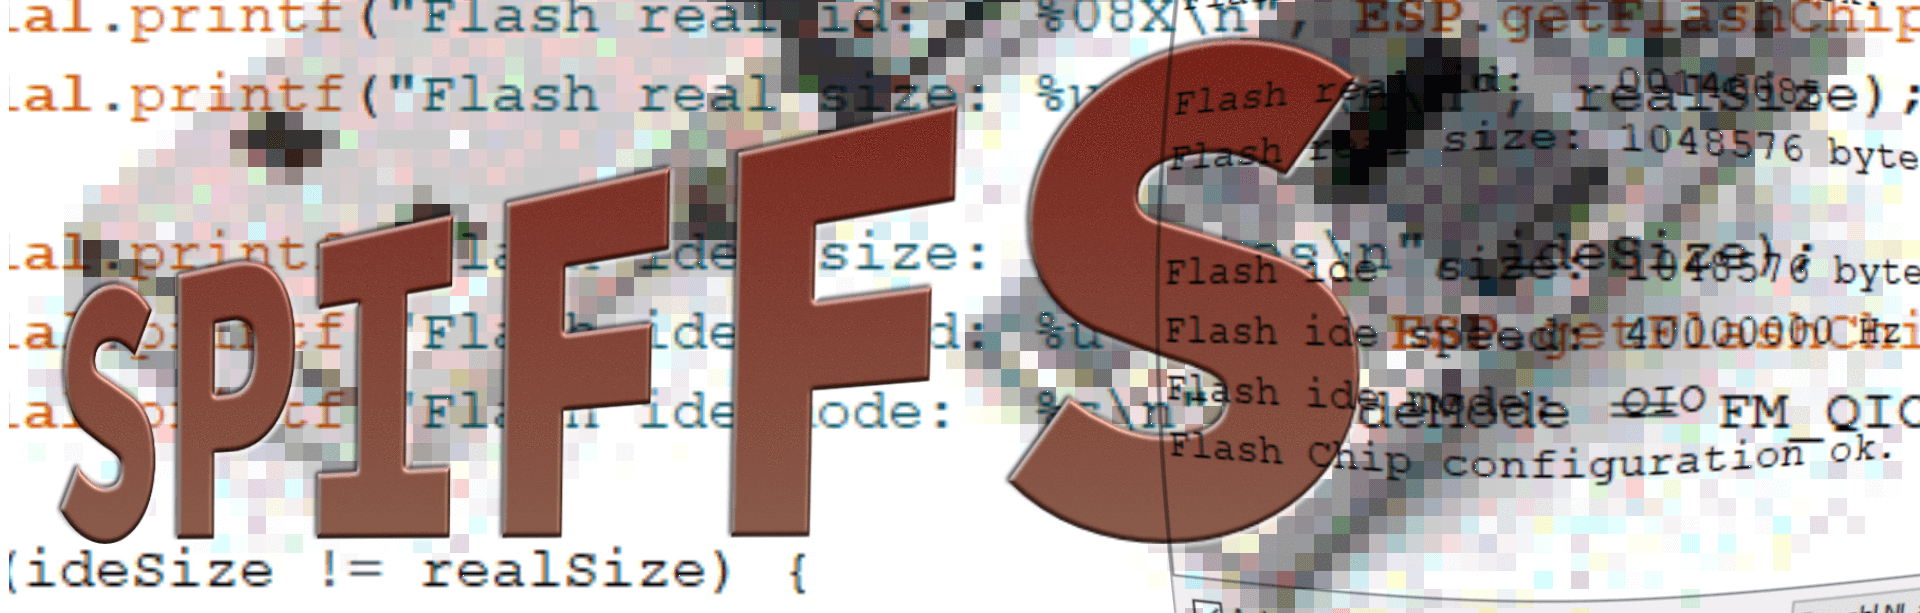
Bonus tip: How big is the flash memory of my ESP 8266?
Depending on which ESP8266 module you use, the size of the flash memory may differ. While you can look for the datasheet by the label on the chip, to be sure there is a small sketch that checks the size, speed and mode of your module. The sketch is available at https://github.com/esp8266/Arduino/tree/master/libraries/esp8266/examples/CheckFlashConfig
Simply upload this sketch and set the serial monitor to 115200 baud, the size of the chip is already displayed.

I hope you enjoyed today's blog post and that it inspired your creativity. From now on you can use the SPIFFS function of your ESP to store e.g. HTML text modules, permanently save sensor data, and much more.
We are very pleased about praise, criticism and suggestions to our blog.
Your Markus Neumann


14 comments
Adele
https://github.com/esp8266/arduino-esp8266fs-plugin/releases/download/0.5.0/ESP8266FS-0.5.0.zip
löst das SPIFFS Error: esptool not found! – Problem
Bernd Albrecht
@ Tom: Bitte der Anleitung folgen, die Max dankenswerterweise am 30. März hier “geposted” hat.
(Ein Bild mit den Einstellungen habe ich per Email gesendet.)
@ all: Einer unserer Blogger wird das Thema, die Fragen und Anregungen erneut aufgreifen.
Zieldatum für Veröffentlichung Mitte Juli 2020
Tom
Hallo Zusammen,
Funktioniert das Flashen von SPIFFS beim “D1 Mini NodeMcu mit ESP8266-12F WLAN Modul für Arduino” nicht.
Ich habe das nun genau nach Anleitung gemacht und bleibe leider bei genau dieser Meldung “SPIFFS Upload failed!” hängen. Den D1 Mini muss man ja nicht extra in den Programmiermodus bringen soweit mir das bekannt ist, oder? Auf jeden Fall finde ich keine Lösung um den Fehler zu beseitigen. Im Anschluss habe ich den gesamten LOG aus dem Arduino IDE kopiert. Vielleicht hat jemand noch eine Idee woran es liegen könnte.
-—————————————————————————————————————————————-
esptool.py v2.8
Serial port COM3
Connecting….
Chip is ESP8266EX
Features: WiFi
Crystal is 26MHz
MAC: ec:fa:bc:59:3f:98
Uploading stub…
Running stub…
Stub running…
Changing baud rate to 460800
Changed.
Configuring flash size…
Auto-detected Flash size: 4MB
Compressed 259824 bytes to 190276…
Writing at 0×00000000... (8 %)
Writing at 0×00004000... (16 %)
Writing at 0×00008000... (25 %)
Writing at 0×0000c000… (33 %)
Writing at 0×00010000... (41 %)
Writing at 0×00014000... (50 %)
Writing at 0×00018000... (58 %)
Writing at 0×0001c000… (66 %)
Writing at 0×00020000... (75 %)
Writing at 0×00024000... (83 %)
Writing at 0×00028000... (91 %)
Writing at 0×0002c000… (100 %)
Wrote 259824 bytes (190276 compressed) at 0×00000000 in 4.3 seconds (effective 482.7 kbit/s)…
Hash of data verified.
Leaving…
Hard resetting via RTS pin…
[SPIFFS] data : C:\Users\Thomas Schmid\Documents\Arduino\D1-Mini-WebserverV4b\data
[SPIFFS] size : 2024
[SPIFFS] page : 256
[SPIFFS] block : 8192
/Test.txt
[SPIFFS] upload : C:\Users\THOMAS~1\AppData\Local\Temp\arduino_build_524988/D1-Mini-WebserverV4b.spiffs.bin
[SPIFFS] address : 0×200000
[SPIFFS] reset : —before default_reset —after hard_reset
[SPIFFS] port : COM3
[SPIFFS] speed : 921600
[SPIFFS] python : python.exe
[SPIFFS] uploader : C:\Users\Thomas Schmid\AppData\Local\Arduino15\packages\esp8266\hardware\esp8266\2.6.3\tools\upload.py
SPIFFS Upload failed!
Danke im Voraus für Eure Hilfe
Gruß Tom
steve
Hallo,
danke für die sehr guten Anleitungen.
Aber wie könnte man als nächstes die entstandene SPIFFS-Datei “test.txt” per SFTP zu aaaaa.bplaced.net (user: bbbbb; passwort: ccccc) hochladen. Beim Raspi funktionierte es mit curl…. oder ncftp…. .
steve
Max
Wer Probleme mit SPIFFS Error: esptool not found! hat tauscht sein ESP8266FS aus.
ESP8266FS-0.5.0.zip
https://arduino-esp8266.readthedocs.io/en/latest/filesystem.html#uploading-files-to-file-system
Peter
Hallo, sehr schönes Tool, beim Kopieren des Codes zeigten sich aber doch viele Tipp-Fehler. Nach Korrektur der (meisten) Fehler sieht es so aus:
/*
Diese Skizze testet, ob die EEPROM-Einstellungen der IDE mit der Hardware übereinstimmenESP8266 CheckFlashConfig von Markus Sattler
*/
void setup (void)
{
Serial.begin(115200);
}
void loop ()
uint32_t realSize = ESP.getFlashChipRealSize(); uint32_t ideSize = ESP.getFlashChipSize(); FlashMode_t ideMode = ESP.getFlashChipMode(); Serial.printf (“Flash-Real-ID:% 08X \n”, ESP.getFlashChipId ()); Serial.printf (“Flash-Realgröße:% u Bytes \n \n”, realSize); Serial.printf (“Flash-Ide-Größe:% u Bytes \n”, ideSize); Serial.printf (“Flash-Ide-Geschwindigkeit:% u Hz \n”, ESP.getFlashChipSpeed()); Serial.printf (“Flash-Ide-Modus:% s \n”, (ideMode == FM_QIO? “QIO”: ideMode == FM_QOUT? “QOUT”: ideMode == FM_DIO? “DIO”: ideMode == FM_DOUT? "DOUT " : “UNBEKANNT”)); if (ideSize != realSize) { Serial.println (“Flash-Chip-Konfiguration falsch! \ N”); } else { Serial.println (“Flash Chip Konfiguration ok. \ N”); } delay(5000);{
}
O.Wenzel
“Soweit so gut, funktioniert das.
Nur wie kann ich die Datei jetzt wieder Zeilenweise auslesen?
Bzw. wie kann ich den Inhalt der Datei wieder in Variablen einlesen?”
*************************
das würde mich auch brennend interessieren, alle Versuche mit array’s , f.seek(3, fs::SeekEnd); etc. führen zu keinem Ergebnis !
Äd Franzis
Lieben Dank, für die Info.
Mal eine Frage: Kann man nur Text-Dateien speichern (also Type char) oder lassen sich auch Messwerte direkt als Integer ablegen. Char ist halt sehr Daten-hungrig.
Ich konnte leider kein entsprechendes Beispiel finden.
/Äd
Matthias
Hallo,
die Fehlermeldung:“SPIFFS Error: esptool” lässt einen Fehler mit dem Setup vermuten und hat nichts mit dem hier zur Verfügung gestellten Code und der Erklärung der Funktionsweise zu tun (danke dafür).
Gruß Matthias
Detlef
vom September 20, 2019
Hallo,
gibt es denn jetzt eine Lösung für den Fehler
SPIFFS Error: esptool not found!
Ich habe das gleiche Problem aber noch keine Lösung gefunden.
wo ist die Lösung ????
Klaus
Hallo,
gibt es denn jetzt eine Lösung für den Fehler
SPIFFS Error: esptool not found!
Ich habe das gleiche Problem aber noch keine Lösung gefunden.
Danke.
Andreas Engelmann
Hallo Herr Neumann,
Danke für den Beitrag. Das Thema Flash wird bei den meisten Tutorials garnicht behandelt. Auch die Informationen zur Flashgrösse gehen meist unter.
Grade für HTML-Seiten für einen Server auf dem ESP32/8266 ist das prima.
Lieber Torsten, ich habe neulich ein schönes Zitat bei " Microkontroller.net "gelesen:
“Wer schnelle Lösungen sucht sollte nicht programmieren”.
Jedes Proggramm ist eine Herausforderung . Nim sie an und finde die Lösung.
Dann kannst du sagen: “Das habe ich programmiert”.
Viel Spaß beim Basteln.
Andreas
Torsten
Wie üblich funktioniert der ganze Kram nur nach tausenden Suchen….
Ich bekomme immer wieder: SPIFFS Error: esptool not found!
Ist und bleibt schlicht Bastelkram,
Christian
Hallo!
Soweit so gut, funktioniert das.
Nur wie kann ich die Datei jetzt wieder Zeilenweise auslesen?
Bzw. wie kann ich den Inhalt der Datei wieder in Variablen einlesen?
Danke