Y aquí viene la continuación de nuestro blog de IoT con Alexa.
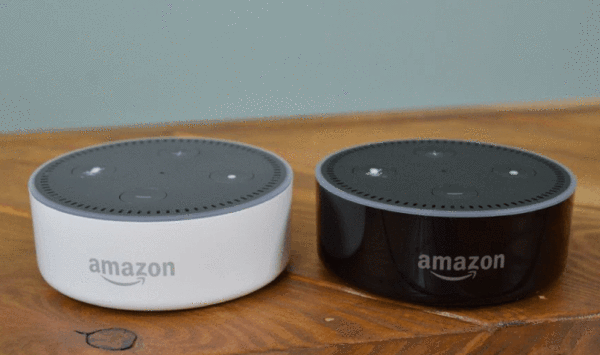
Tuvimos suficiente tiempo para conocer a Alexa y dejarnos tocar música. Pero ahora también queremos que Alexa controle un ESP8266-01S.
Para mantenerlo simple al principio, encendemos el LED OnBoard en el ESP8266-01S.
Además de la Alexa y el ESP8266-01S, necesitamos un poco de software. Si aún no puedes programar el ESP8266-01S, echa un vistazo a nuestro eBook.
Sourcetree (Requerido para fauxmoESP, ver instrucciones del blog)
Para instalar fauxmoESP, echa un vistazo a la entrada de blog correspondiente.
ESPAsyncTCP y ESPAsyncWebServer se pueden descargar directamente a través de github a través del botón verde de descarga a la izquierda (clonar o descargar):


Después de haber descargado todos los paquetes y copiado fauxmoESP a la carpeta de bibliotecas, incluimos las otras dos bibliotecas.
Iniciamos el software Arduino y vamos a "Sketch > Incluir biblioteca > . Biblioteca ZIP..."


Ahora seleccionamos un paquete y hacemos clic en Abrir. Repetimos esto con el segundo paquete.
En el IDE de Arduino obtenemos este mensaje de éxito:

Ahora tenemos que editar un archivo por un corto tiempo, a saber, el "credentials.sample.h" en
"Documents-Arduino-libraries-fauxmoesp-examples-fauxmoESP_Basic".
Este archivo tiene que ser renombrado a "credentials.h" y abrimos el archivo con un editor (Notepad++) y complementamos nuestros datos Wi-Fi.
#define WIFI_SSID "..."
#define WIFI_PASS "..."
Ahora hemos integrado los 3 paquetes necesarios y finalmente podemos lidiar con la programación.
Ahora comencemos en Ejemplos > FauxmoESP > fauxmoESP_Basic

Después de cargar el ejemplo, cambiamos el LED al puerto 1 en la línea 11:
#define Led                2

Se convierte:
#define Led 1
También podemos cambiar el nombre del dispositivo en la línea 59:
fauxmo.addDevice("Cambiar uno");
¿Qué tal "Arduino" como nombre del dispositivo?
fauxmo.addDevice("Arduino");
Con este nombre, Alexa puede dirigir y controlar el dispositivo.
Ahora transferimos el boceto de Arduino a nuestro ESP8266-01S.

Una vez completada la carga y reiniciado el ESP8266, deberías haber encontrado un nuevo dispositivo en tu red Wi-Fi. El dispositivo ahora es Amazon-xxxxxx.
Ahora vamos a lanzar la aplicación Amazon Alexa en su teléfono.


7 comentarios
Andreas Wolter
Khaled Abu Dawud: ich verweise an dieser Stelle mal auf den Kommentar von Johann Kellner weiter unten. Ansonsten hilft Ihnen eventuell auch dieser Beitrag:
https://www.az-delivery.de/blogs/azdelivery-blog-fur-arduino-und-raspberry-pi/alexa-steuert-eine-lavalampe
Khaled Abu Dawud
Gerät wir im Alexa-App nicht angezeigt,
ich hab das Problem, dass Alexa-App ESP8266 nicht findet, obwohl die Verbindung zwischen ESP8266 und dem Netzwerk, mit dem Alexa verbunden ist, erfolgt hat.
wie kann ich dieses Problem lösen?
vielen Dank
Bernd Albrecht
Stellungnahme zum Kommentar von AndreasD:
Selbstverständlich werden Kommentare zu Blog-Beiträgen zeitnah geprüft, Hinweisen auf Fehler nachgegangen, Fragen beantwortet usw.
Aber wir leben in einer schnelllebigen Zeit. Bitte erwarten Sie nicht, dass ein fast 2 ½ Jahre alter Blog-Beitrag daraufhin geprüft wird, ob die benutzten Programm-Bibliotheken noch funktionieren oder die verwendete Hardware noch zu erwerben ist. Um immer wieder spannende Themen zu beleuchten, gibt es wie überall auch personelle Veränderungen, so dass neue Blogger dazu kommen und andere ausscheiden.
Deshalb werden bestimmte Thema wie z.B. Alexa gelegentlich neu aufgegriffen und in einem weiteren Blog-Beitrag aktualisiert und beschrieben.
AndreasD
Schade, dass der Ersteller sich nicht zu Wort meldet. Dies passiert nicht nur hier in diesem Blog. Ich habe einige schöne Projekte versucht nachzubauen,doch leider ohne Erfolg. Ich dachte, die Blogs werden von AZ-Delivery erstellt und gepflegt. Aber dem scheint nicht so zu sein. Da findet man ein Projekt, was einem zusagt, kauft die Teile hier im Shop und die liegen dann leider nur ungenutzt rum.
Wie ist es hier beim Projekt. Es wird geschrieben, dass sourcetree erforderlich ist und dies im weiteren Blog erklärt wird. So weit so gut. Die Erklärung habe ich glaube verstanden. Was ich nicht verstanden habe ist, nutze ich die hier angegebene fauxmo-Bibliothek oder die, die ich dann über sourcetree erzeugt habe?
Oder habe ich das mit sourcetree doch nicht richtig verstanden?
Beste Grüße,
Andreas
Johann Kellner
Dieser Blog-Eintrag setzt offensichtlich auf der alten fauxmoESP library (V 2.4.x) auf, welche noch Belkin-WEMO-Switche emuliert hatte.
Die aktuelle fauxmoESP Library (Stand Juli 2020) wurde grundlegend überarbeitet und emuliert nun Philips Hue-Lampen. Daher werden im Beispiel-Programm auch wesentlich mehr GPIO-Pins verwendet:
#define LED_YELLOW 4
#define LED_GREEN 5
#define LED_BLUE 0
#define LED_PINK 2
#define LED_WHITE 15
Diese Anzahl an GPIOs stehen aber auf einem ESP01S nicht zur Verfügung.
Daher den Blog-Eintrag bitte dahingehend anpassen, dass man sich die ältere Version der fauxmoESP-Bibliothek ziehen muss, damit das Beispiel funktionieren kann!
Jan
Das Problem der nicht angezeigten Geräte habe ich auch mit ESP8266-Modulen manchmal. Im Webfrontend von Amazon sind diese auch aufgeführt, wenn die App sie nicht zeigt. Am besten erst mal das testen, hat mich wahnsinnig gemacht.
AndreasD
Hallo,
eine wunderbare Idee, sein ‘Smart-Home’ über Alexa zu erweitern. Ich nutze einen Wemos D1 Mini und bin auch bei meiner Fritzbox angemeldet. Leider bekomme ich bei Alexa kein neues Gerät angezeigt. Allerdings scheint auch meine fauxmoESP_Basic anders zu sein, denn ich habe mehrere Zeilen mit zum Beispiel fauxmo.addDevice(ID_YELLOW);
Spielt es eine Rolle, wie weit mein Echo (Alexa) entfernt steht? Die Fritzbox hat doch den ESP. Meine Echos sind alle 2. GEneration. Den Sketch habe ich unten angefügt.
Danke für jede Hilfe!
Beste Grüße, Andreas
#include
#ifdef ESP32
#include
#else
#include
#endif
#include “fauxmoESP.h”
// Rename the credentials.sample.h file to credentials.h and
// edit it according to your router configuration
#include “credentials.h”
fauxmoESP fauxmo;
// -—————————————————————————————————————
#define SERIAL_BAUDRATE 115200
#define LED_YELLOW 4
#define LED_GREEN 5
#define LED_BLUE 0
#define LED_PINK 2
#define LED_WHITE 15
#define ID_YELLOW “yellow lamp”
#define ID_GREEN “green lamp”
#define ID_BLUE “blue lamp”
#define ID_PINK “pink lamp”
#define ID_WHITE “white lamp”
// -—————————————————————————————————————
// -—————————————————————————————————————
// Wifi
// -—————————————————————————————————————
void wifiSetup() {
// Set WIFI module to STA mode WiFi.mode(WIFI_STA); // Connect Serial.printf("[WIFI] Connecting to %s ", WIFI_SSID); WiFi.begin(WIFI_SSID, WIFI_PASS); // Wait while (WiFi.status() != WL_CONNECTED) { Serial.print(“.”); delay(100); } Serial.println(); // Connected! Serial.printf(“[WIFI] STATION Mode, SSID: %s, IP address: %s\n”, WiFi.SSID, WiFi.localIP().toString().c_str());}
void setup() {
// Init serial port and clean garbage Serial.begin(SERIAL_BAUDRATE); Serial.println(); Serial.println(); // LEDs pinMode(LED_YELLOW, OUTPUT); pinMode(LED_GREEN, OUTPUT); pinMode(LED_BLUE, OUTPUT); pinMode(LED_PINK, OUTPUT); pinMode(LED_WHITE, OUTPUT); digitalWrite(LED_YELLOW, LOW); digitalWrite(LED_GREEN, LOW); digitalWrite(LED_BLUE, LOW); digitalWrite(LED_PINK, LOW); digitalWrite(LED_WHITE, LOW); // Wifi wifiSetup(); // By default, fauxmoESP creates it’s own webserver on the defined port // The TCP port must be 80 for gen3 devices (default is 1901) // This has to be done before the call to enable() fauxmo.createServer(true); // not needed, this is the default value fauxmo.setPort(80); // This is required for gen3 devices // You have to call enable(true) once you have a WiFi connection // You can enable or disable the library at any moment // Disabling it will prevent the devices from being discovered and switched fauxmo.enable(true); // You can use different ways to invoke alexa to modify the devices state: // “Alexa, turn yellow lamp on” // "Alexa, turn on yellow lamp // “Alexa, set yellow lamp to fifty” (50 means 50% of brightness, note, this example does not use this functionality) // Add virtual devices fauxmo.addDevice(ID_YELLOW); fauxmo.addDevice(ID_GREEN); fauxmo.addDevice(ID_BLUE); fauxmo.addDevice(ID_PINK); fauxmo.addDevice(ID_WHITE); fauxmo.onSetState([](unsigned char device_id, const char * device_name, bool state, unsigned char value) { // Callback when a command from Alexa is received. // You can use device_id or device_name to choose the element to perform an action onto (relay, LED,…) // State is a boolean (ON/OFF) and value a number from 0 to 255 (if you say “set kitchen light to 50%” you will receive a 128 here). // Just remember not to delay too much here, this is a callback, exit as soon as possible. // If you have to do something more involved here set a flag and process it in your main loop. Serial.printf(“[MAIN] Device #%d (%s) state: %s value: %d\n”, device_id, device_name, state ? “ON” : “OFF”, value); // Checking for device_id is simpler if you are certain about the order they are loaded and it does not change. // Otherwise comparing the device_name is safer. if (strcmp(device_name, ID_YELLOW)==0) { digitalWrite(LED_YELLOW, state ? HIGH : LOW); } else if (strcmp(device_name, ID_GREEN)==0) { digitalWrite(LED_GREEN, state ? HIGH : LOW); } else if (strcmp(device_name, ID_BLUE)==0) { digitalWrite(LED_BLUE, state ? HIGH : LOW); } else if (strcmp(device_name, ID_PINK)==0) { digitalWrite(LED_PINK, state ? HIGH : LOW); } else if (strcmp(device_name, ID_WHITE)==0) { digitalWrite(LED_WHITE, state ? HIGH : LOW); } });}
void loop() {
// fauxmoESP uses an async TCP server but a sync UDP server // Therefore, we have to manually poll for UDP packets fauxmo.handle(); // This is a sample code to output free heap every 5 seconds // This is a cheap way to detect memory leaks static unsigned long last = millis(); if (millis() – last > 5000) { last = millis(); Serial.printf(“[MAIN] Free heap: %d bytes\n”, ESP.getFreeHeap()); } // If your device state is changed by any other means (MQTT, physical button,…) // you can instruct the library to report the new state to Alexa on next request: // fauxmo.setState(ID_YELLOW, true, 255);}